In the world of barbecue, few dishes command as much respect and attention as perfectly smoked brisket. Slow-cooked barbecue brisket, with its tender, melt-in-your-mouth texture and smoky flavor, promises to satisfy even the most discriminating palates.
Smoked Brisket and Burnt Ends is the ultimate in backyard BBQ cooking. However, there is something mysterious, aloof and a bit scary about cooking a brisket. After all, it's a very big cut of meat and the idea of making burnt ends just take the fear index up tenfold.
But it doesn't have to be intimidating. Learn how to trim a brisket and you are halfway there. Learning how to smoke a beef brisket is easy and making burnt ends is not hard at all. In this recipe, we dive into the art of making smoked brisket and its delectable byproduct - burnt ends. From selecting the right roast to mastering the smoking process, this recipe unravels the secrets behind creating this barbecue masterpiece. So, take the plunge and smoke a brisket. It's just not that hard and absolutely worth the effort. You will be glad you did.
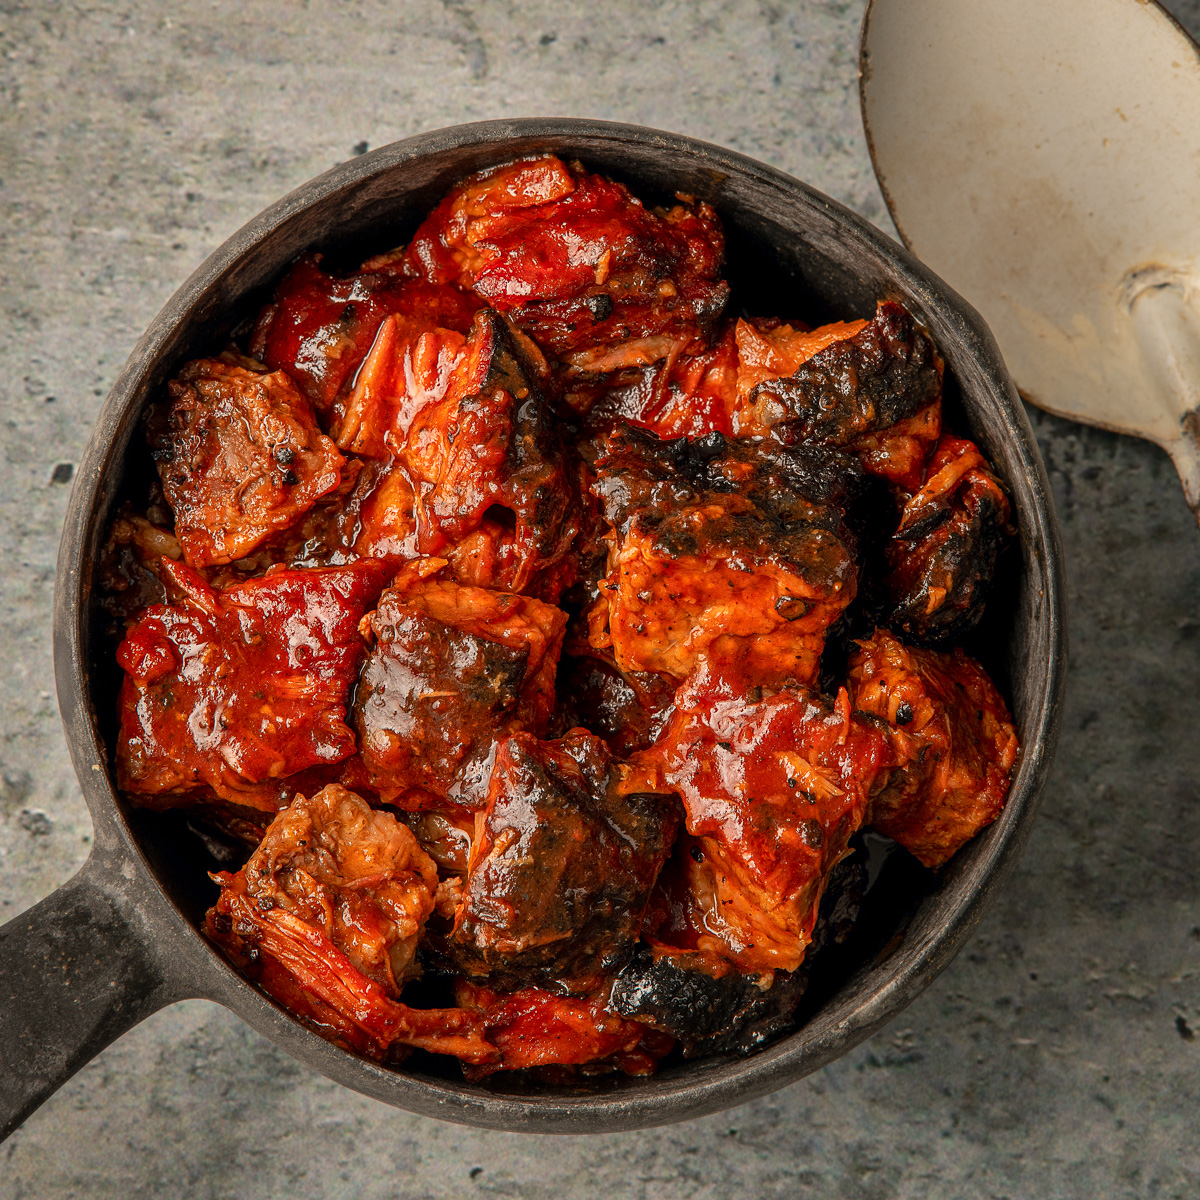
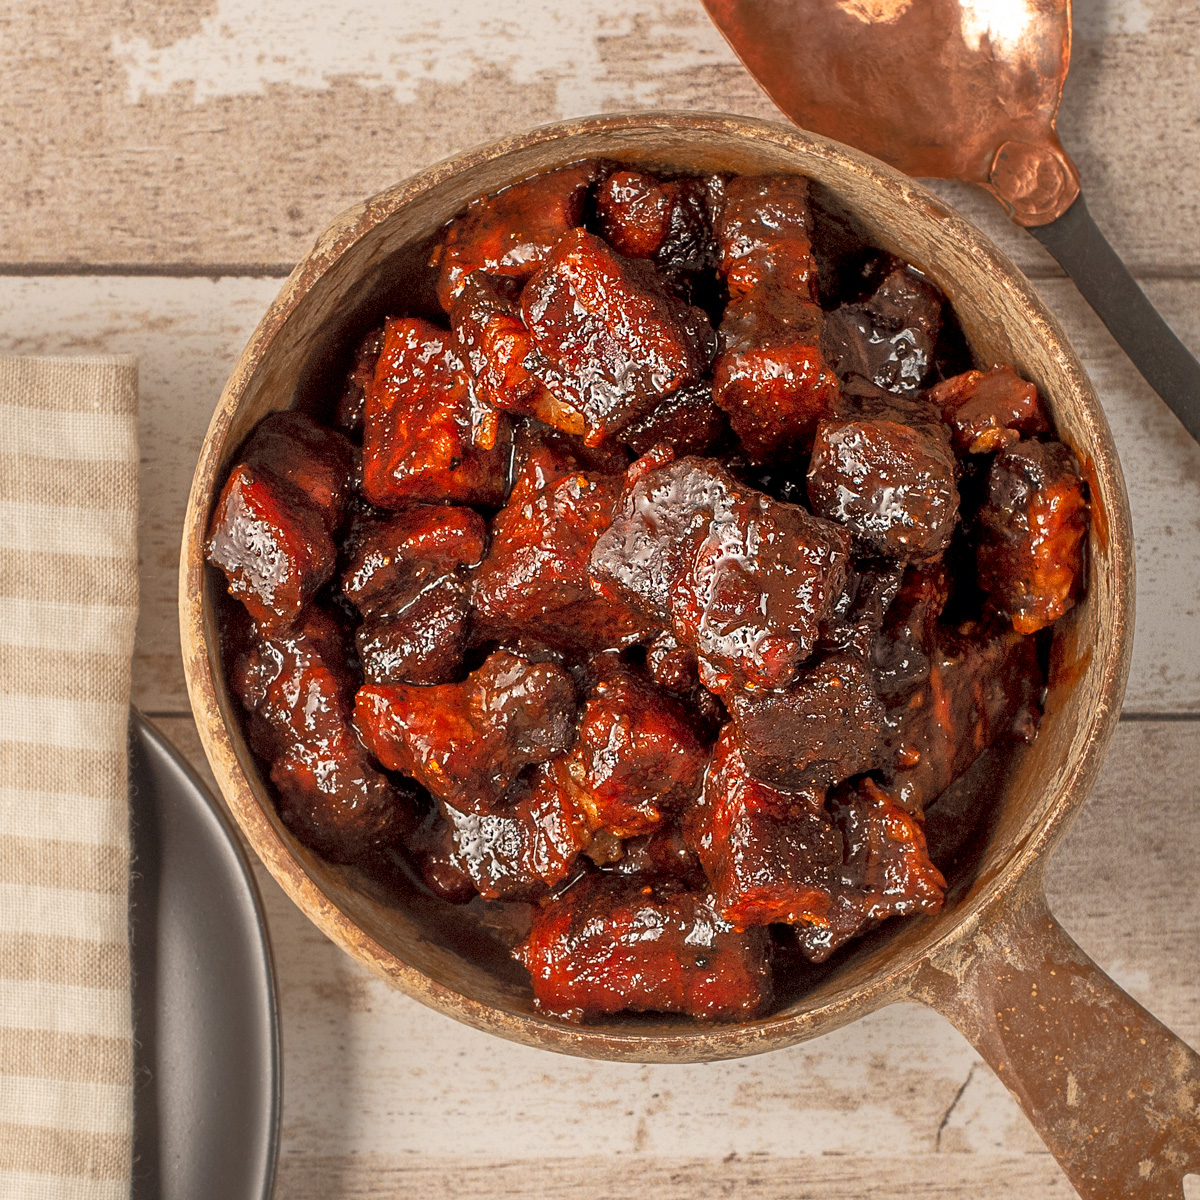
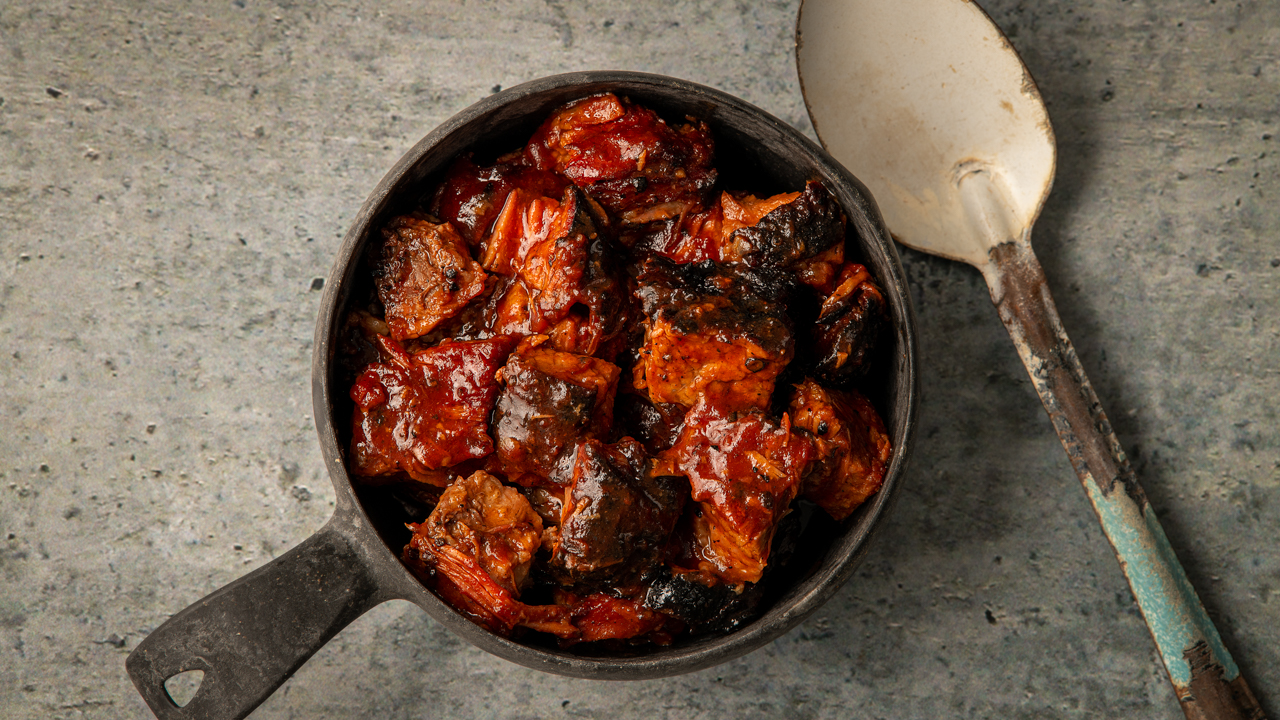
Just check out the mouthwatering brisket burnt ends in the photo below.
If you want to make the best brisket, one of the first things you need to do is a little reading. There are a few things to learn before heading out to the butcher shop, like how to trim the brisket. Watch my video How to Trim a Beef Brisket to get the low down on what to cut and what to leave. Next, read my post on How Long to Cook a 15 Pound Brisket for Best Results. Finally, read my post on How to Know When a Brisket is Done. They are all fairly short but will provide a lot of information that you need to know.
Ingredients
This recipe starts with a 12 pound whole brisket.
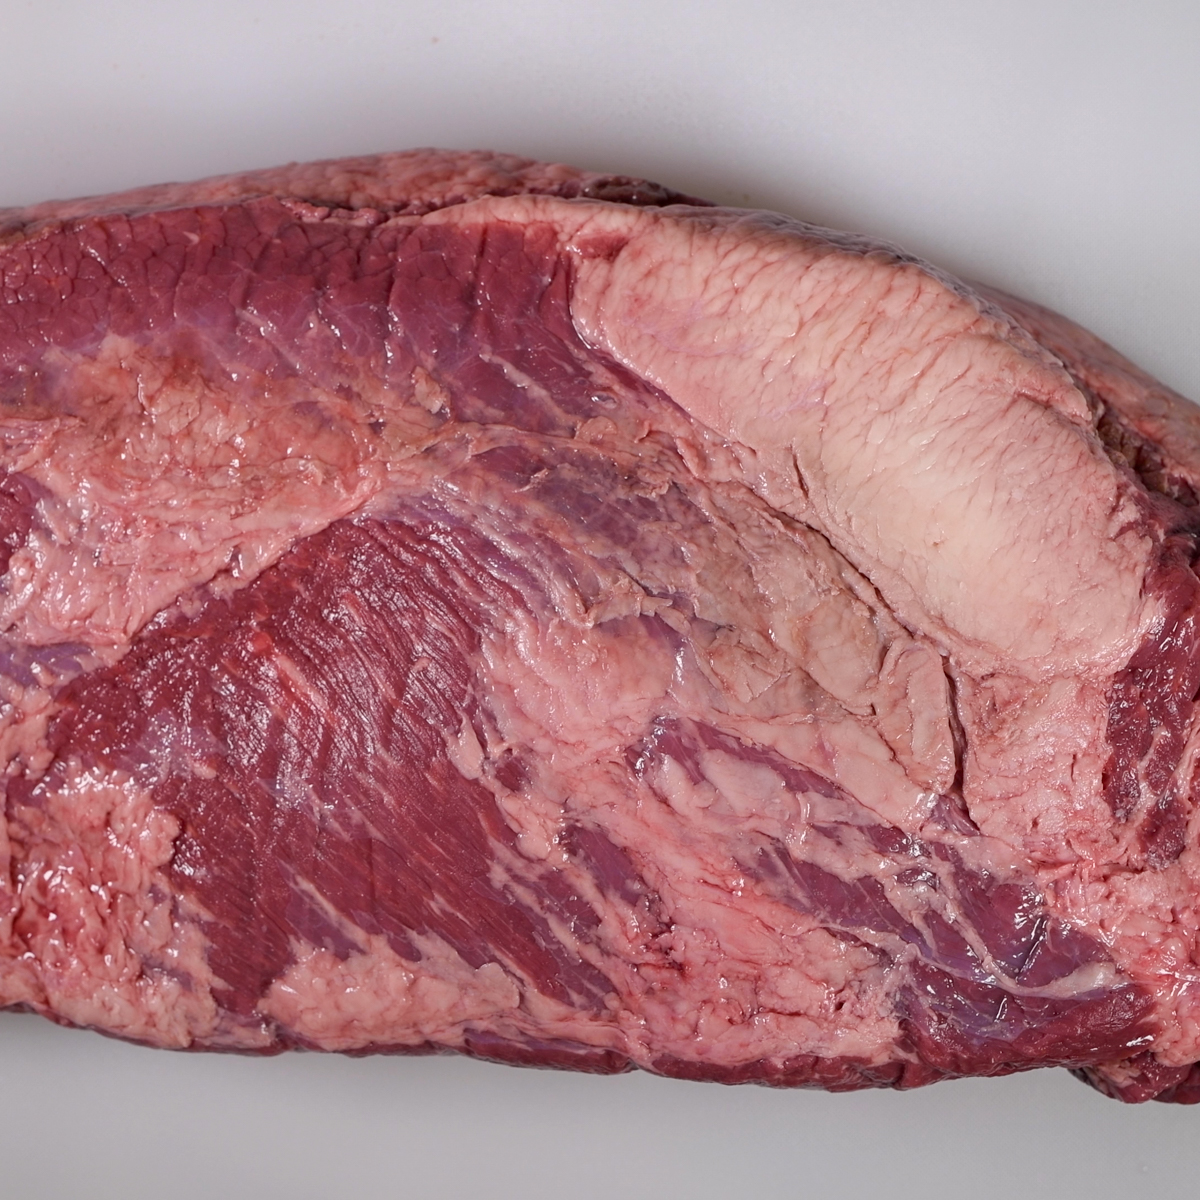
- Whole packer brisket
- Kosher salt
- Black pepper
- Barbecue sauce
See recipe card for quantities.
Instructions
How to Choose a Brisket
Over the years I have made a lot of brisket. I have tried different grades like choice, prime and even Wagyu. If I had to pick one, my go-to choice would be a prime brisket. Why, you may ask? Well, let me break it down for you.
A prime brisket offers a bit more marbling compared to choice grade. Now, I know most of that fat renders out during the cooking process, so you might wonder if there's really that much of a difference. And truth be told, the difference is minimal. However, I personally prefer having more fat in the brisket, just in case it cooks a bit longer than expected. This additional fat helps prevent the meat from drying out. It may not be a significant reason, but considering the nominal cost difference, I would opt for a prime brisket every single time.
A Wagyu brisket is significantly more expense than a prime brisket and almost four times the cost of a choice brisket. For my money it's not worth the price tag. The reason to buy Wagyu beef in the first place is to be able to taste all that wonderful fat. But, if most of it renders out, then you will have a very happy smoker and no significant difference in the final brisket. Save your money and invest in some more cool BBQ gear.
When it comes to selecting your ideal brisket for those mouthwatering burnt ends, there are a few things to keep in mind. While grade matters, it's also crucial to inspect the brisket for its fat and marbling content. Not all prime grade briskets are created equal, so it's essential to assess the fat and marbling levels. Look for a brisket with a good amount of fat and marbling, as this will contribute to those tender and melt-in-the-mouth burnt ends.
While a prime brisket provides a slight advantage in terms of marbling, it's the fat content that truly matters for maintaining moistness during the cooking process. When selecting your brisket, prioritize a prime grade for that extra bit of marbling. But don't forget to inspect the brisket for fat and marbling levels.
How to Trim a Brisket
It is important to trim excess fat, particularly deckle fat, from the brisket before smoking. Too much fat interferes with smoke penetration. In addition, it is important to trim away the edges where the meat is very thin. Read my post on How to Trim a Beef Brisket for more information.
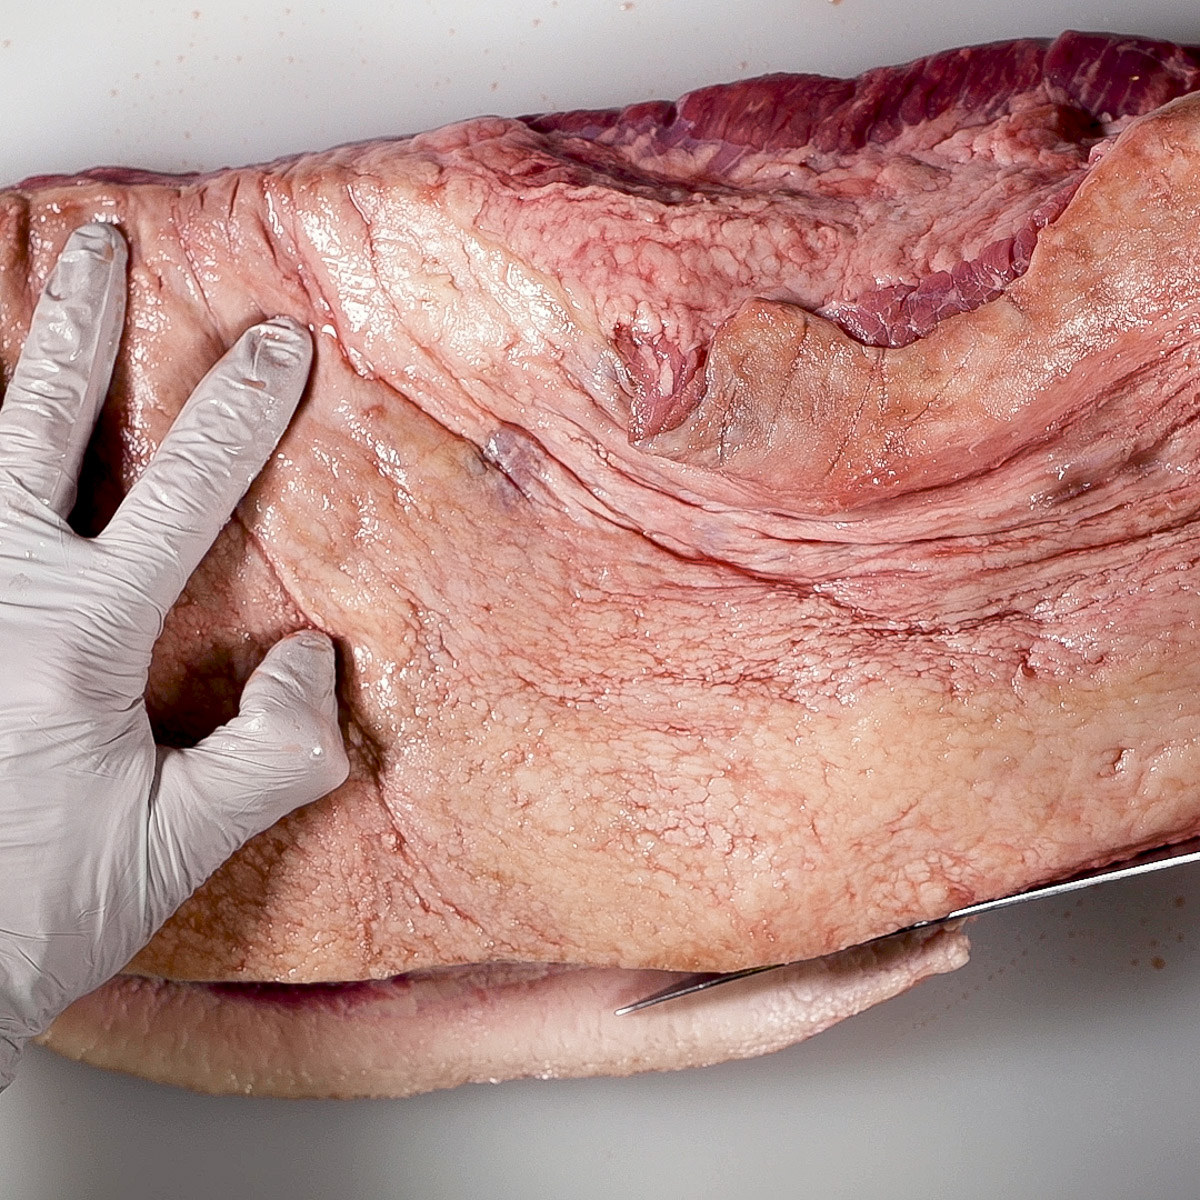
Trim the thin edge of the brisket.
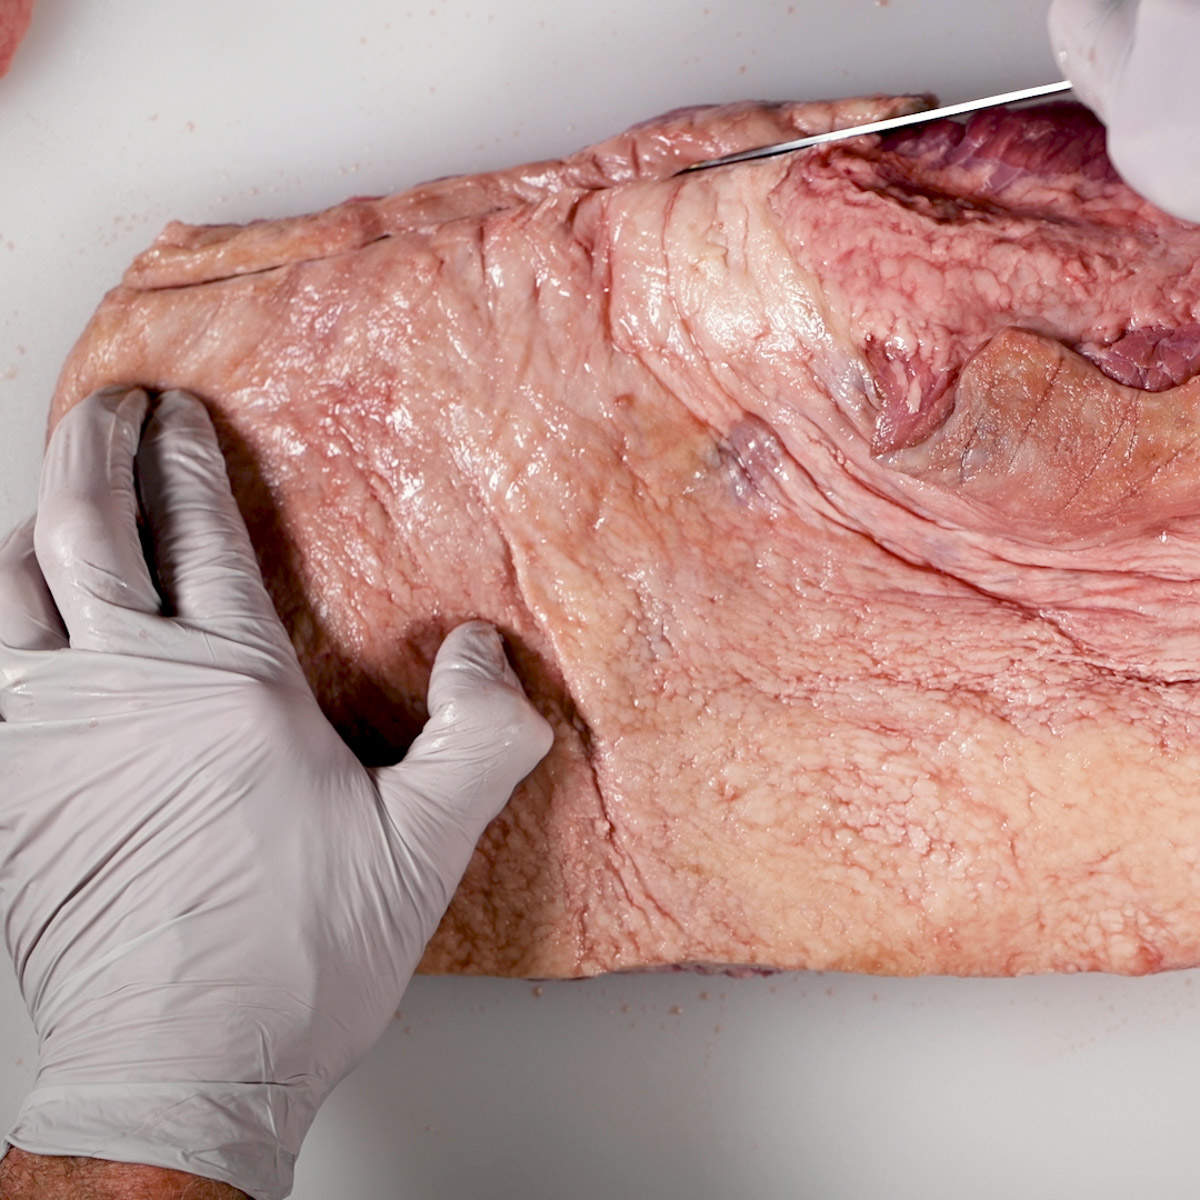
Next, trim the thick edge of the brisket.
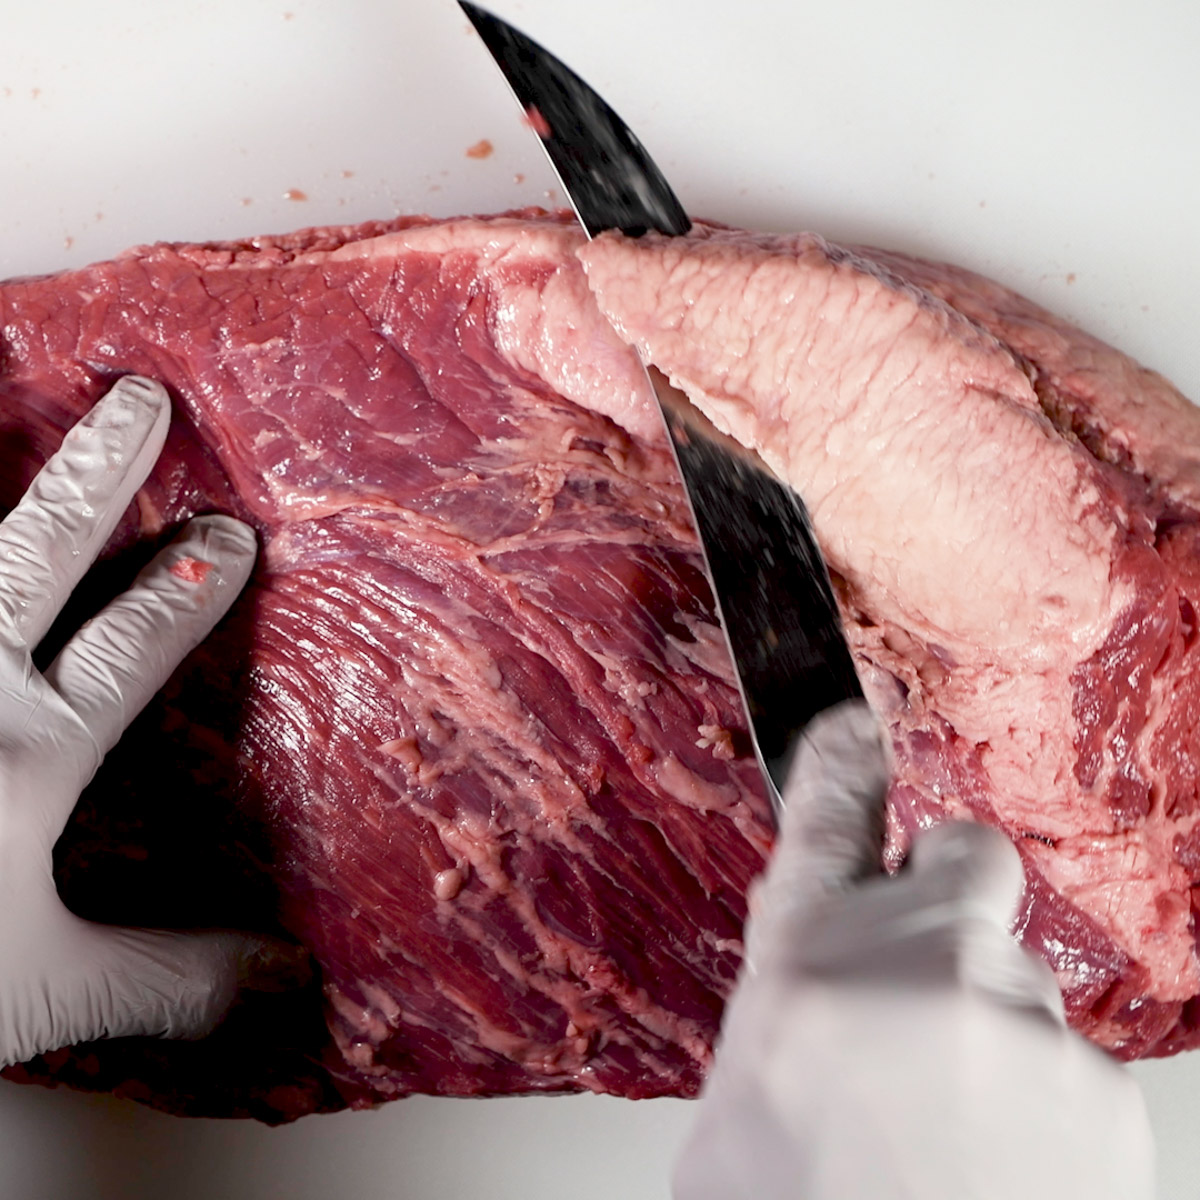
Trim the thick fat deposit on the meat side of the brisket.
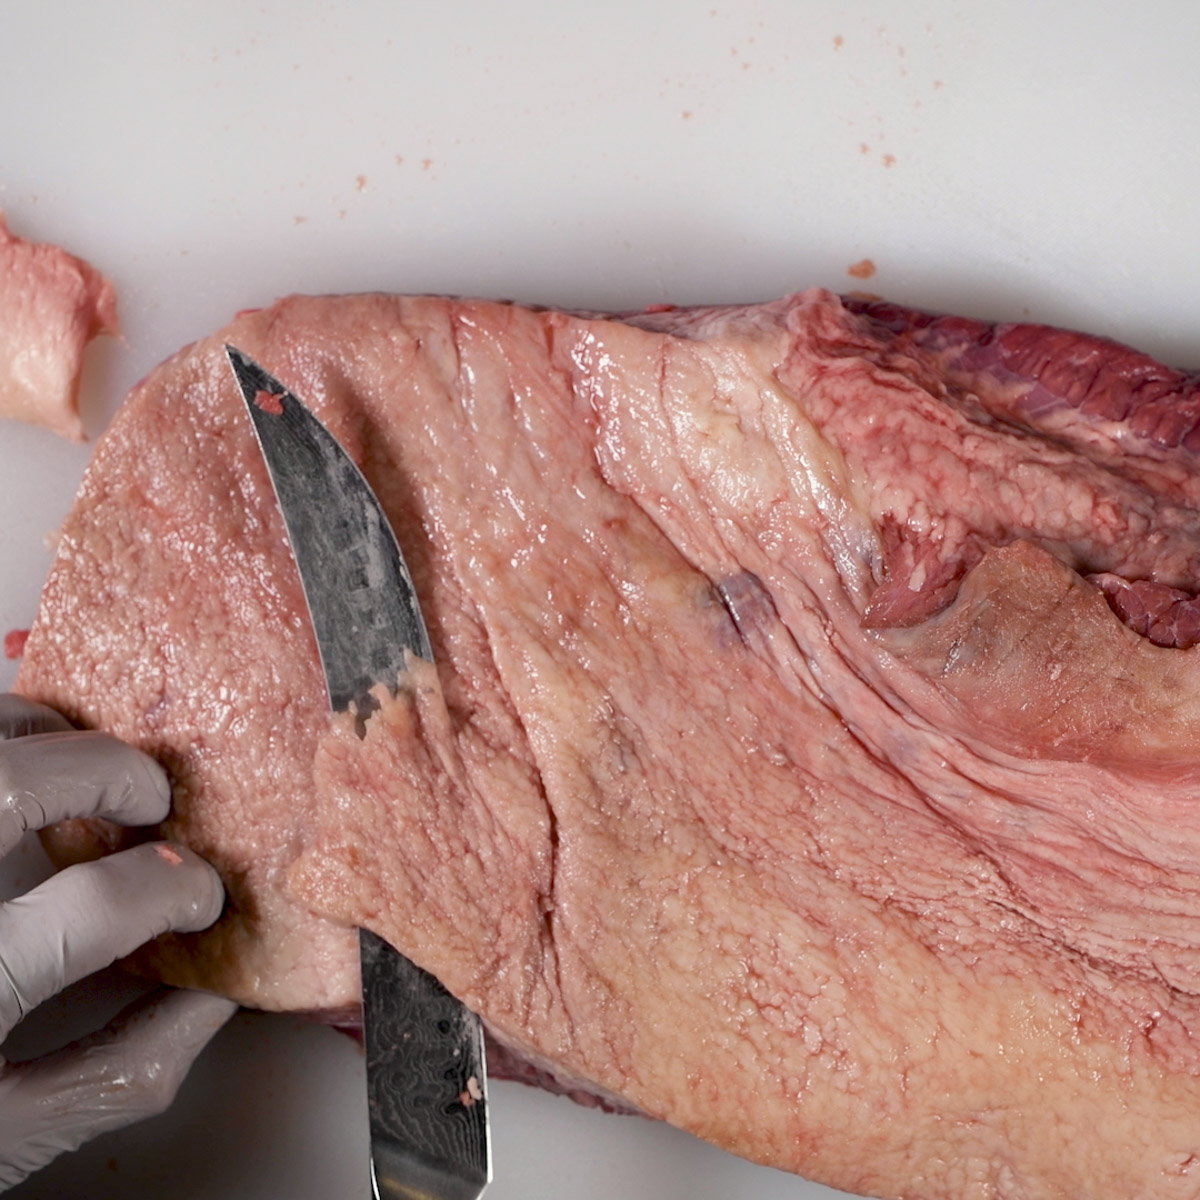
Trim the fat side (aka the fat cap) down to about ¼" layer of fat.
Dry Rub Texas Style
I live in Austin, Texas and I can tell you that Texans are fanatic about their brisket. It is THE go to meat at any respectable barbecue joint in town. Franklin Barbecue is pretty much the go to place for brisket in Austin and owner Aaron Franklin is Brisket King. He cooks a LOT of brisket and I have learned a lot from him. Many of his tips and techniques are incorporated into this post and my other posts on brisket.
Texans like to taste the meat and the smoke, not a bunch of sissy, crybaby, yellow belly, mama's boy dry rub full of brown sugar, paprika, molasses and a whole bunch of other stuff that does not belong on brisket. To be fair, I like all that stuff on baby back ribs, but that's not the point. The point is that Texans like it simple, salt and pepper, that's it. Rub it in and show it some smoke. That is how you make Texas barbecue brisket.
Aaron Franklin's brisket recipe is crazy simple. Take one packer brisket, add kosher salt, black pepper, some smoke and a lot of time and you have BBQ brisket.
Smoke the Brisket
Smoke until the brisket reaches an internal temperature of 165˚F. It can take awhile to break down connective tissue which is what is needed for tender brisket. See my post on How Long to Cook a 15 Pound Brisket for Best Results for more information. Also, see my post on Using a Water Pan in Your Smoker for the Best Results.
Spritz with Water
Starting with the second hour smoking, a brisket should be spritzed with water every 30 - 45 minutes. Spritzing is important for several reasons. First, it prevents the brisket from drying out during the cooking process. The inside of a smoker is a harsh environment and a little moisture goes a long way. Second, it helps with the formation of a smoke ring in the brisket. Third, spritzing helps create a delicious, crusty bark on the brisket. These are all good reasons to spritz your brisket.
The Stall
Every brisket ever cooked will have its internal temperature climb steadily until it hits about 160˚F - 165°F. Then, it just stops, seemingly forever. It just sits there around 165˚F and does not move. Welcome to the stall.
This is the mysterious point in the life of a brisket where the cooking temperature stops climbing until evaporation stops. Remember separating two or more mixed liquids in chemistry class? The temperature would rise and then stall at the boiling point of one of the liquids, then it would rise again until the boiling point of the next liquid was reached. A brisket is kind of like that. The brisket will form moisture on the crust that cools the brisket as it evaporates. Clearly water does not boil at 160˚F, but the science is correct. The internal temperature is not moving until the evaporation stops.
Resist the temptation to open the lid and peak or add more wood. You will just add 10 minutes to the overall cooking time every time you do. Be patient, it will break through. When it does and the temperature starts to climb, take the brisket out and wrap it up.
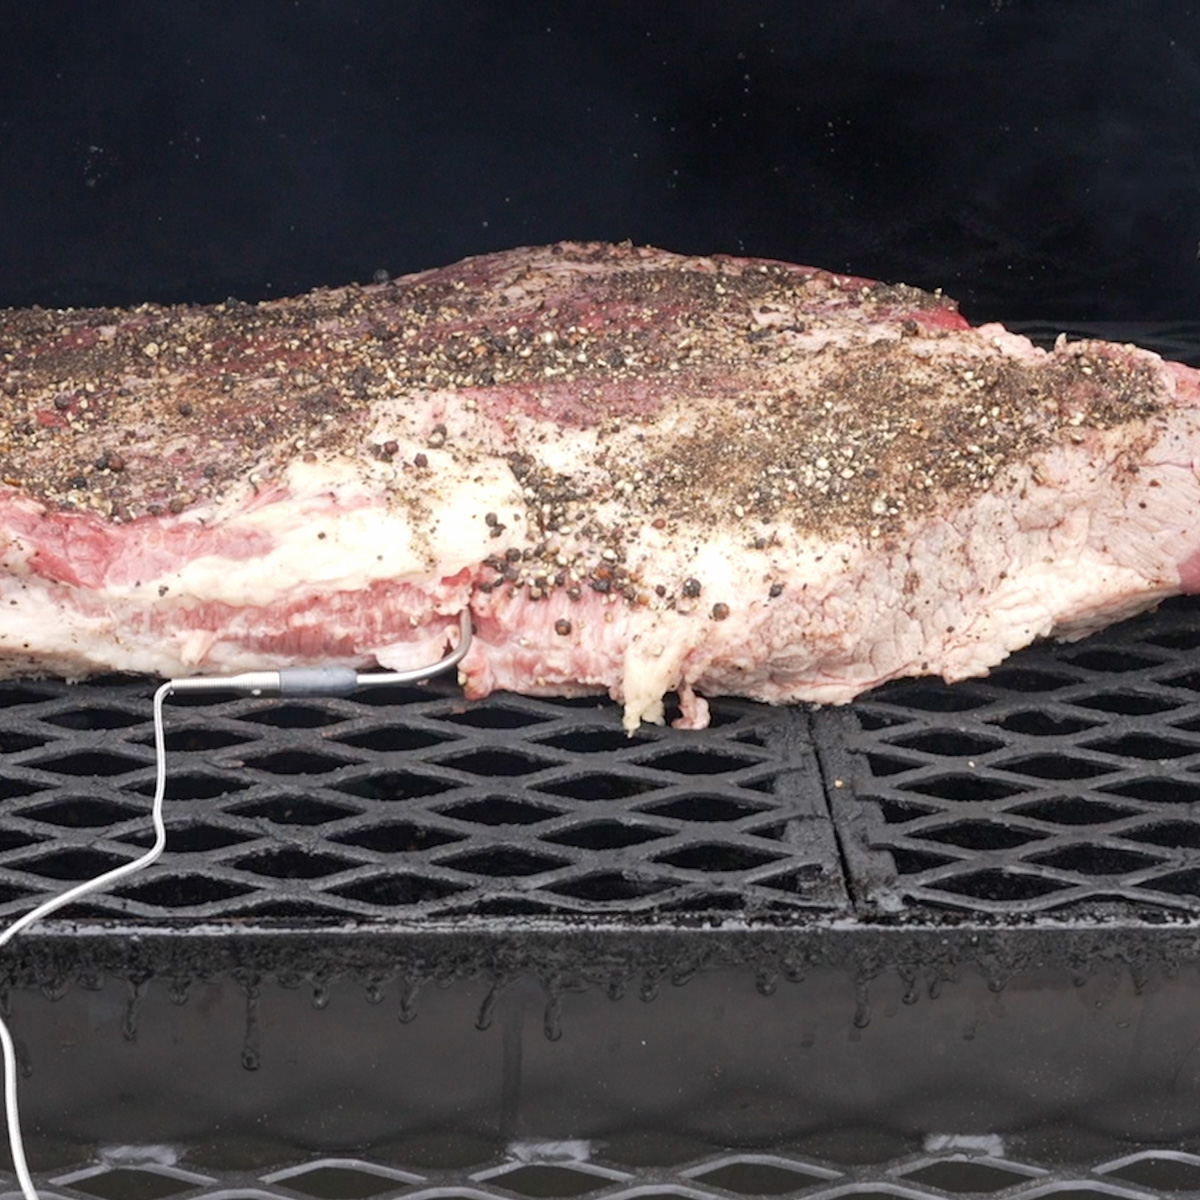
Place the brisket in the smoker with a thermometer inserted into the thickest part of the brisket.
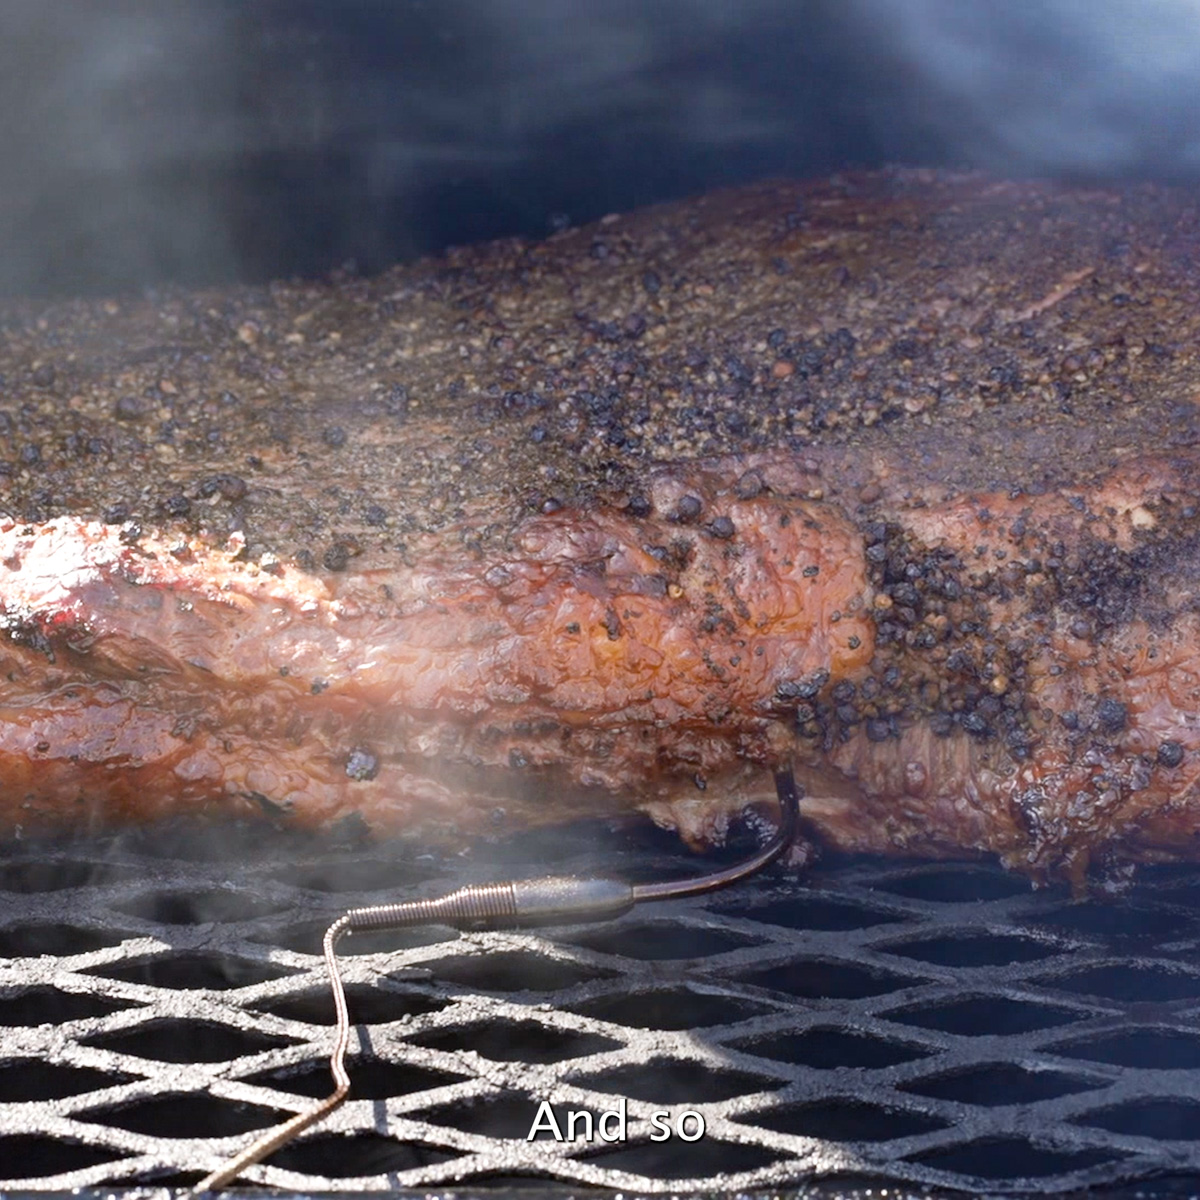
Brisket with bark is starting to form.
To Wrap or Not to Wrap, That is the Question
There are a two different opinions out there regarding whether or not to wrap a brisket when it comes out of the stall. I have tried both, and I prefer wrapped. The real reason is that a bunch of BBQ pit masters, who have cooked way more brisket, believe in wrapping a brisket with all of their soul. Aaron Franklin is one of them. I figure if it's good enough for Aaron Franklin, it's good enough for me.
Aluminum Foil vs. Pink Butcher Paper
A brisket can be wrapped in aluminum foil, a technique called the Texas Crutch. The foil basically steams the brisket and produces an end product with a texture like a pot roast. It will taste fine, but it will be little looser that if you used butcher paper.
Many BBQ gurus, including Aaron Franklin and Steve Raichlen, now use pink butcher paper (aka peach butcher paper) exclusively. The pink butch paper allows the brisket to breathe resulting in a better texture. Pink butcher paper is easy to find online, I bought mine at webstaurant.com. I live in Austin, TX and noticed that my local market now carries pink butcher paper. You should have no trouble finding it. See my post on Will Pink Butcher Paper Burn in a Smoker.
Beef tallow or beef stock should be added to the brisket once the bark is set and the roast has broken through the stall (about 165°F). Use half a cup of melted beef tallow or beef stock and paint it on the roast to enhance the flavor of the meat. After adding the beef tallow or stock, the brisket should be wrapped with or pink butcher paper and placed back on the smoker.
Learning how to wrap brisket in peach paper is easy. Just lay two pieces down on a table with about a 6" overlap. Lay the brisket in one corner, fold it over, then fold both sides in and the roll up the rest. Place the roast back in the smoker in the same orientation that it was before being wrapped. Remember, you are not really smoking the brisket in the peach butcher paper wrap. Smoking is done and no additional smoke will penetrate the peach butcher paper, and that's OK. At this point, it's about preserving the remaining moisture in the meat, not adding more smoke.
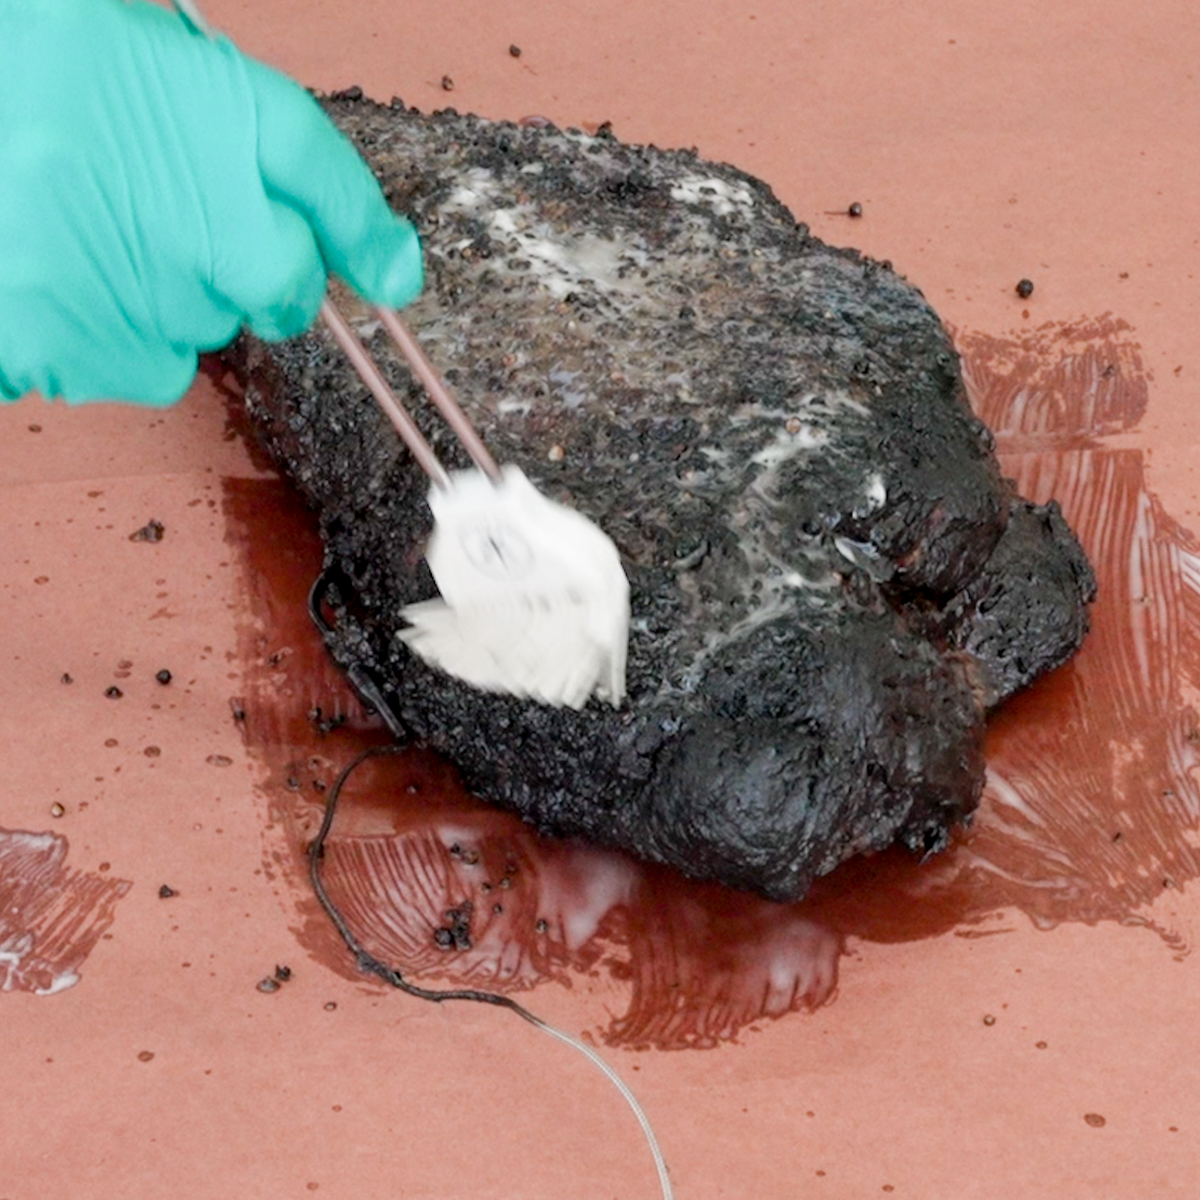
It may not be conventional, but I add a bit of Wagyu beef tallow or beef broth to both the brisket and the paper prior to wrapping. I think it helps keep it most and adds a bit of flavor.
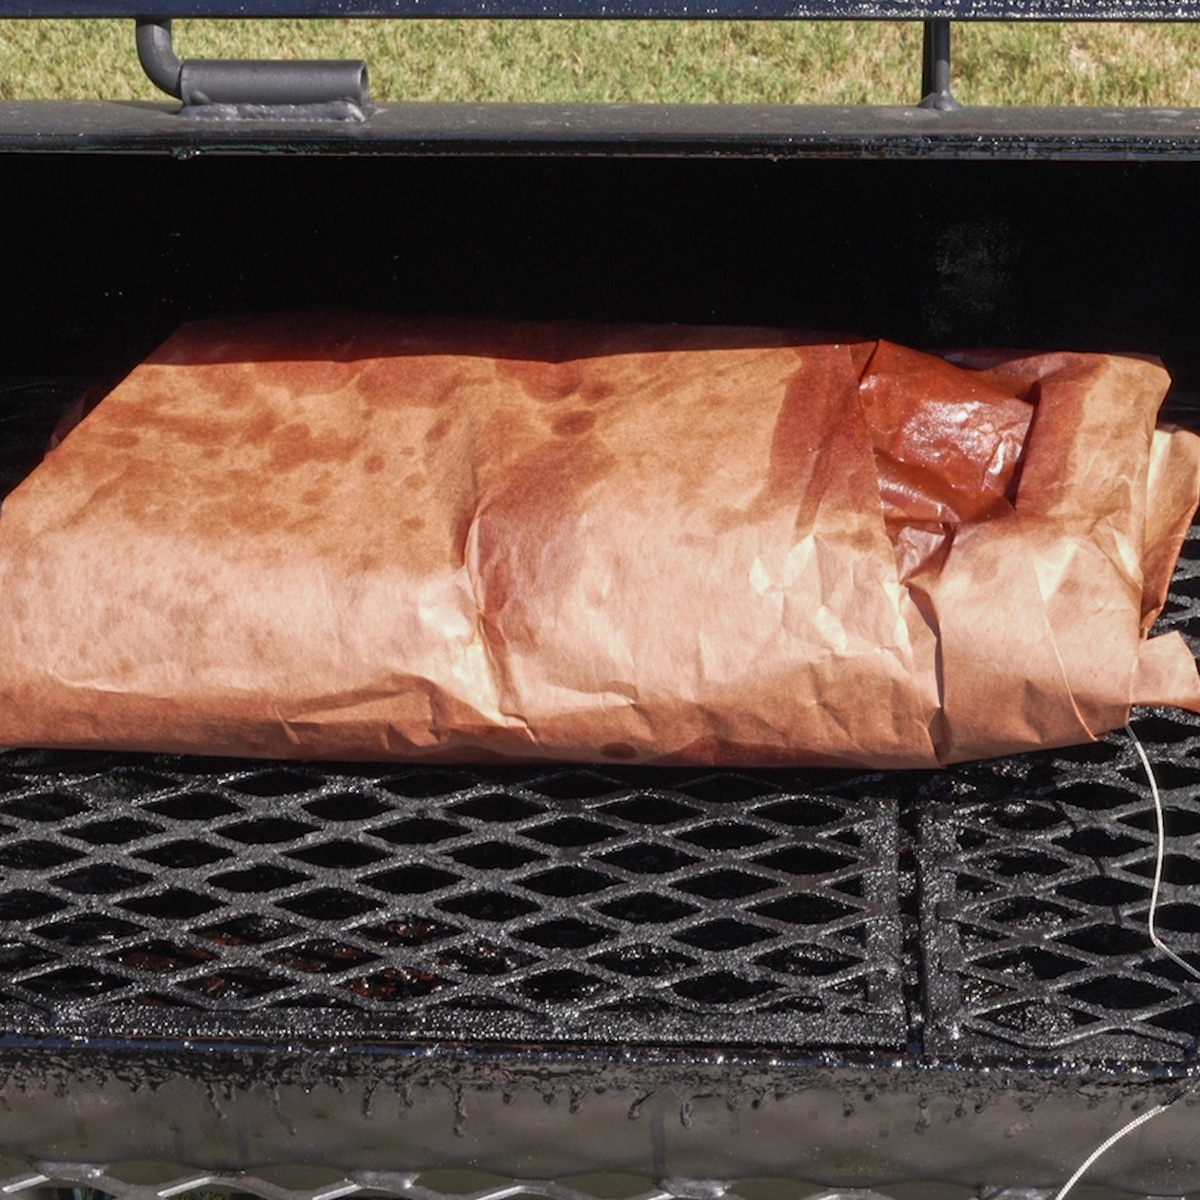
Place the wrapped brisket back into the smoker until the internal temperature reaches 202˚F on an instant-read thermometer (about two hours).
Burnt Ends or Fatty Brisket, You Cannot Have Both
Most BBQ spots in Austin leave the point on the brisket and ask if you want lean or fatty brisket. That means do you want just the flat or part of the flat and point. This is also how most competition cooks cut their brisket. Well, that may be fine for them but not for me. I love burnt ends. To me, burnt ends are the nectar of the BBQ gods.
I would buy just brisket points if I could find them. So, I always separate the point from the flat after cooking and make burnt ends. I just can't help myself. My wife keeps telling me that the first step to getting well is to recognize that I have a problem. I'm not there yet.
Remove the brisket from the smoker. Separate the point from the flat by gently inserting a knife between the two. The thin fat layer holding them together will be easy to cut through.
Cut the point into 1.5 - 2" chunks and place them in an aluminum pan. Cover with your favorite BBQ sauce and return to the smoker, uncovered for two hours.
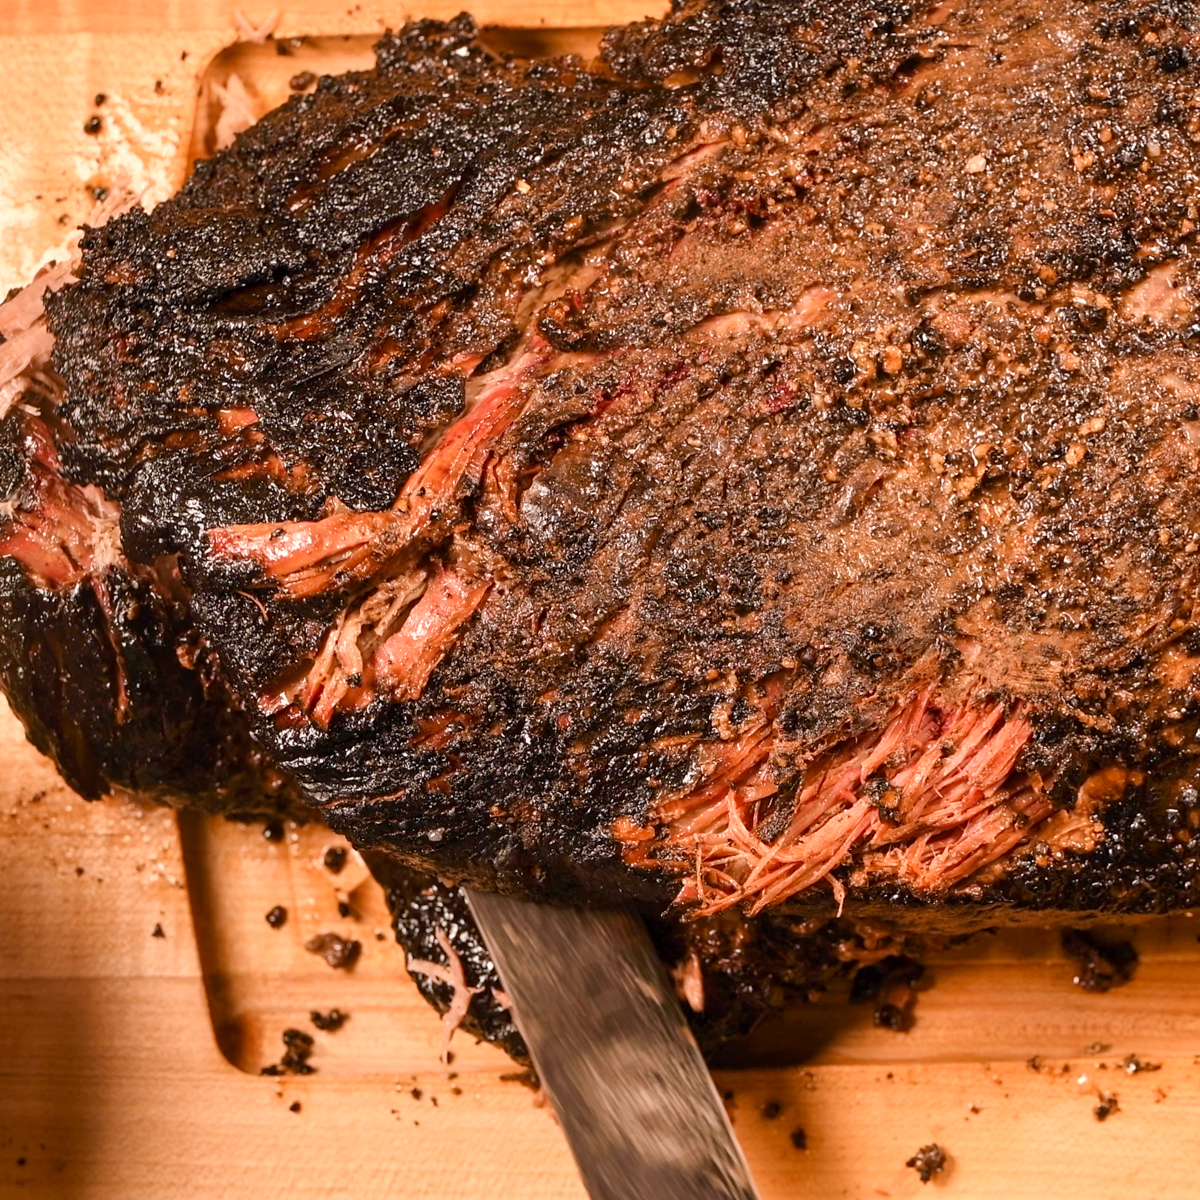
Slice through the fat separating the point from the flat.
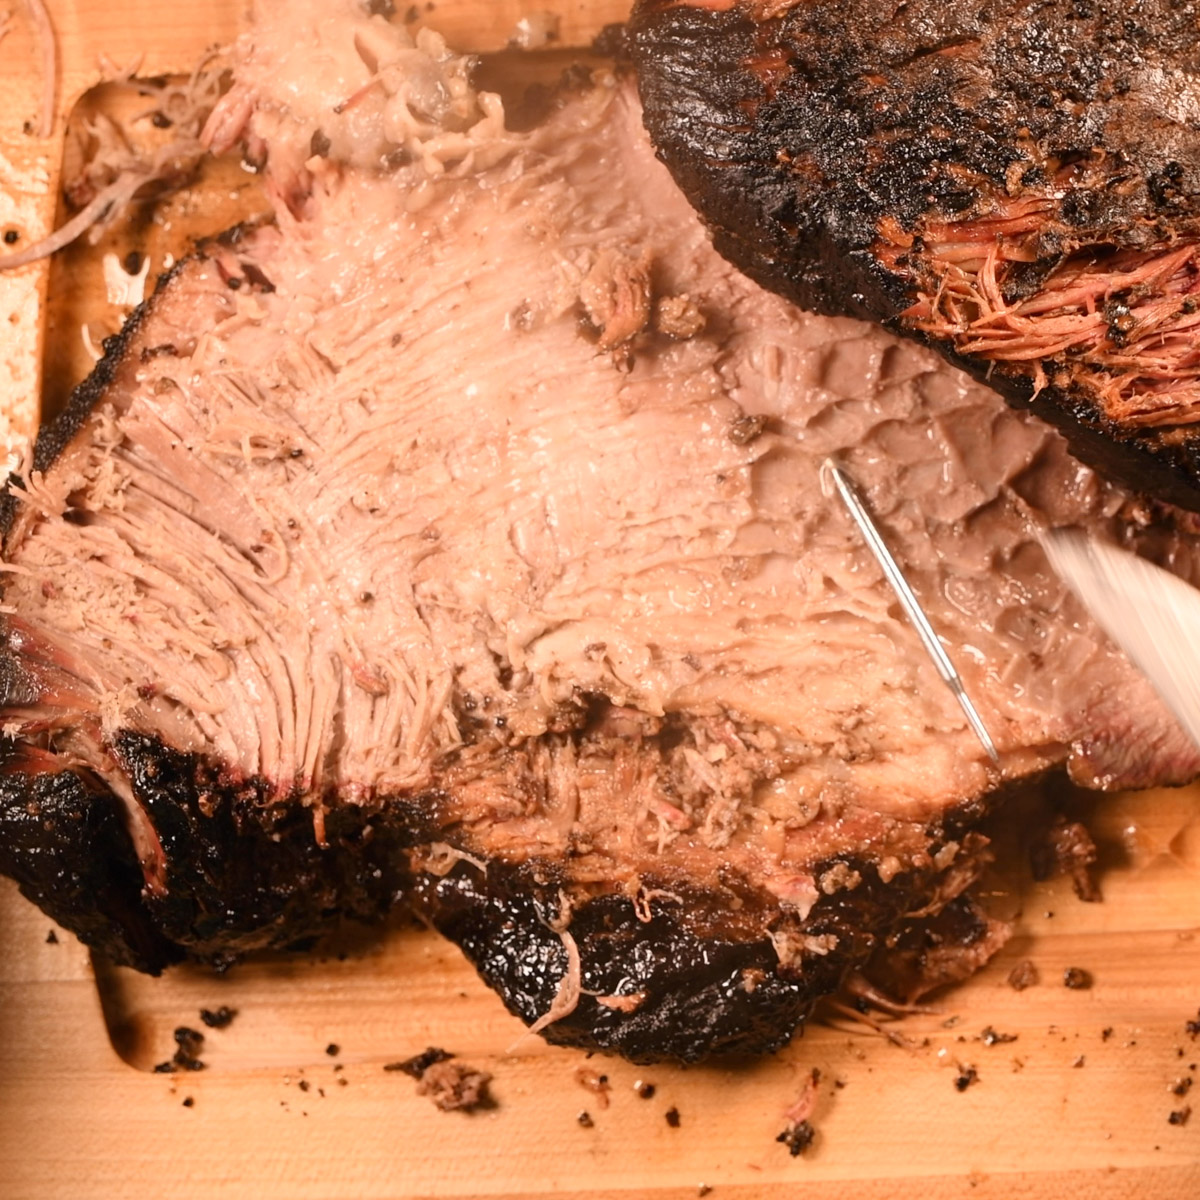
Then slide the separated point out from under the flat.
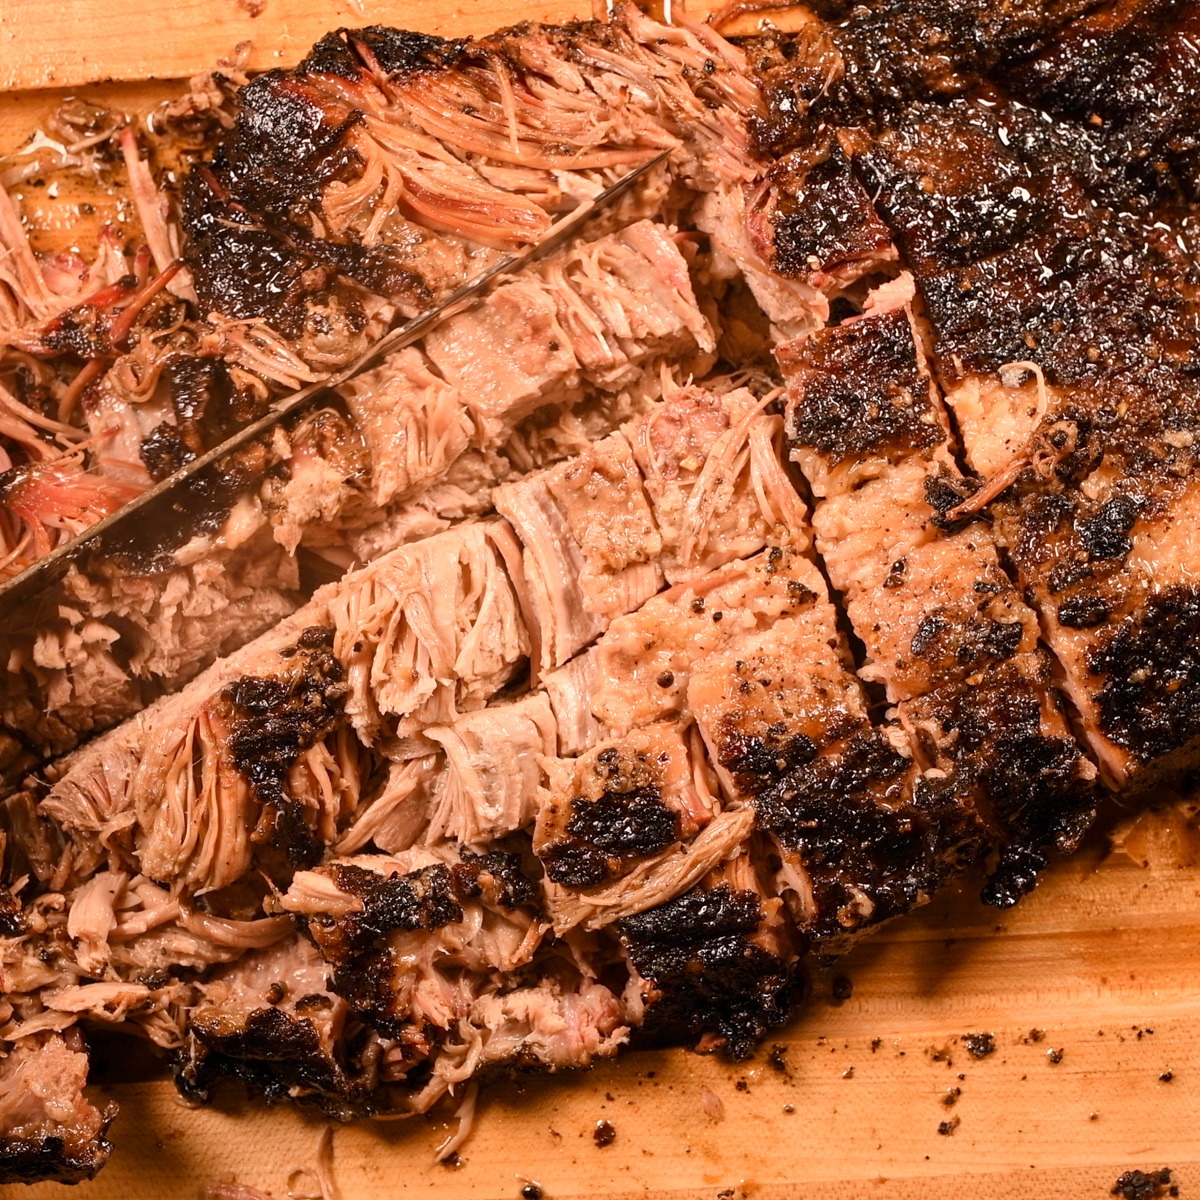
Cut the brisket point into pieces for burnt ends.
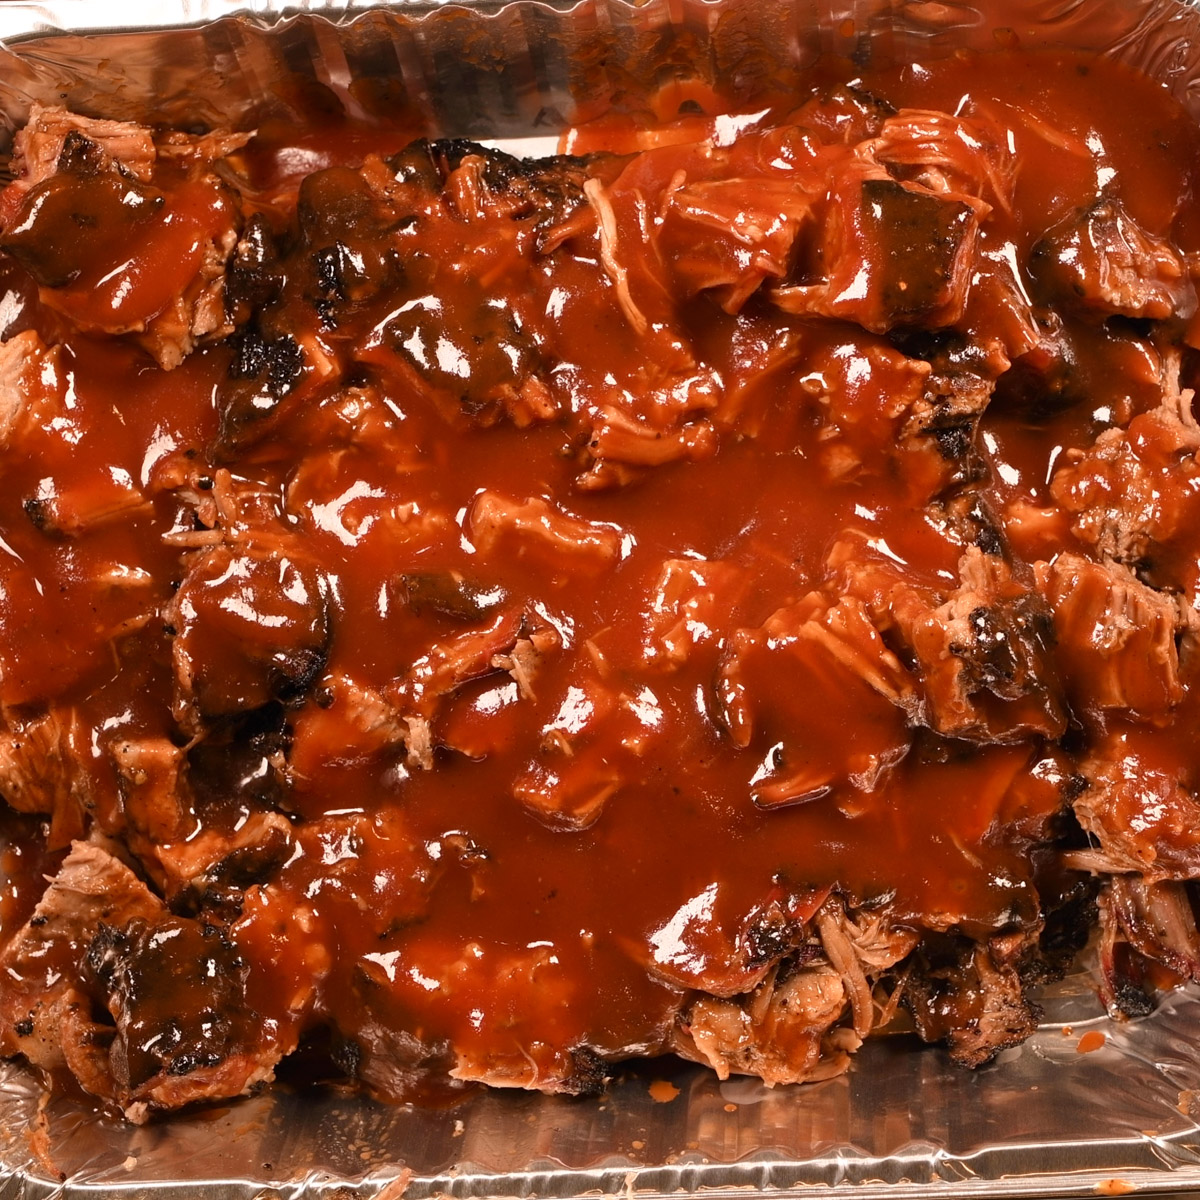
Place the point pieces in an aluminum pan and cover with BBQ sauce. Place the pan back in the smoker and cook for another hour. To ensure the brisket cubes are done, they should be cooked to an internal temperature of 205°F-210°F.
Let it Rest
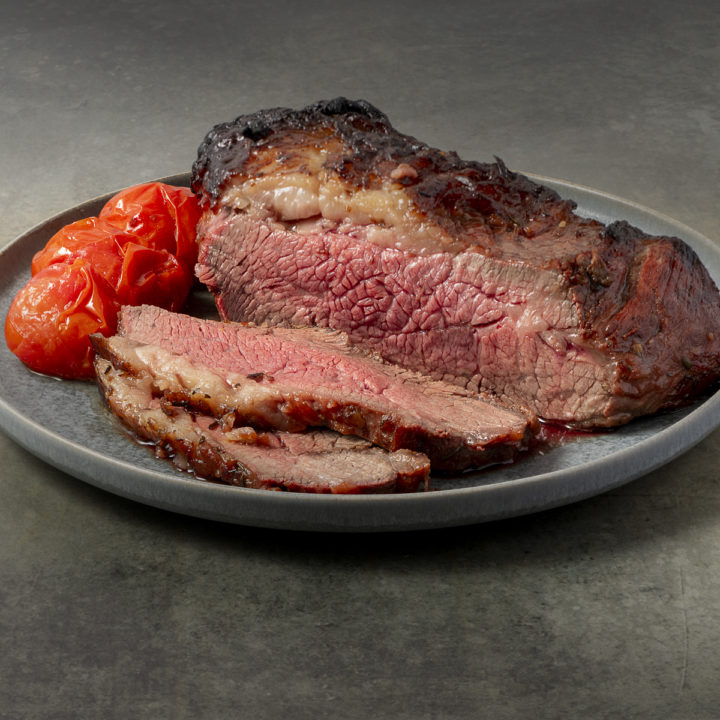
Wrap the flat portion in butcher paper, then a few towels and place in an empty cooler, that is room temperature, to rest for two hours. This step is VERY IMPORTANT if you want juicy brisket. Take a look at the two pictures below. The brisket on the left was cut right away and the juice ran out leaving a dry brisket. The brisket on the right rested for two hours which allowed all of that juice to be reabsorbed into the meat. The result was a very juicy brisket.
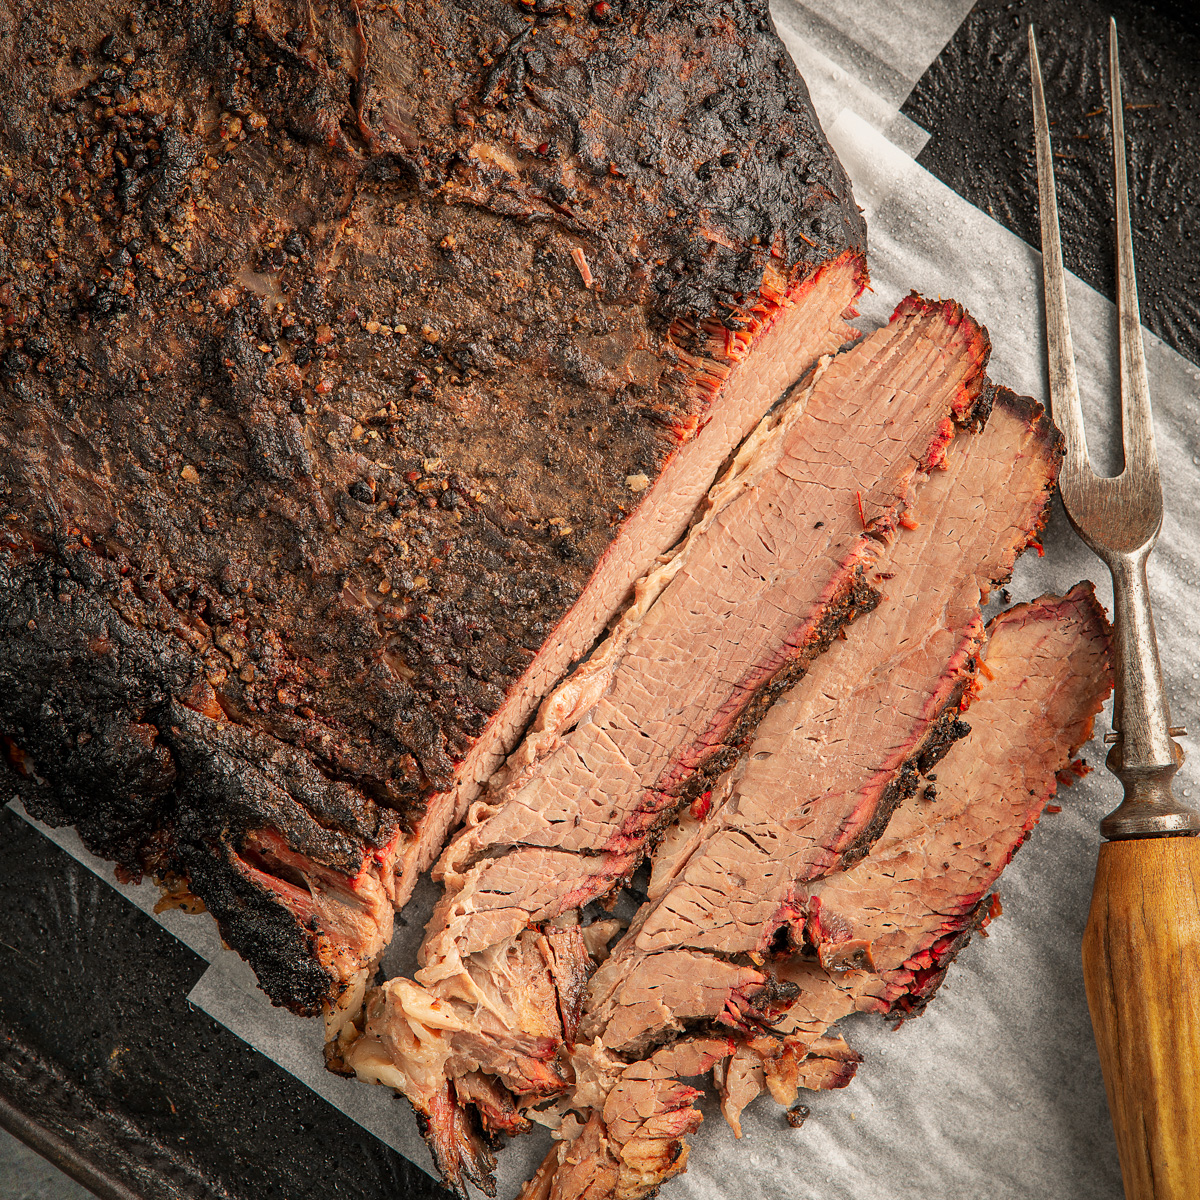
Brisket cut right away was dried out because the juice ran out.
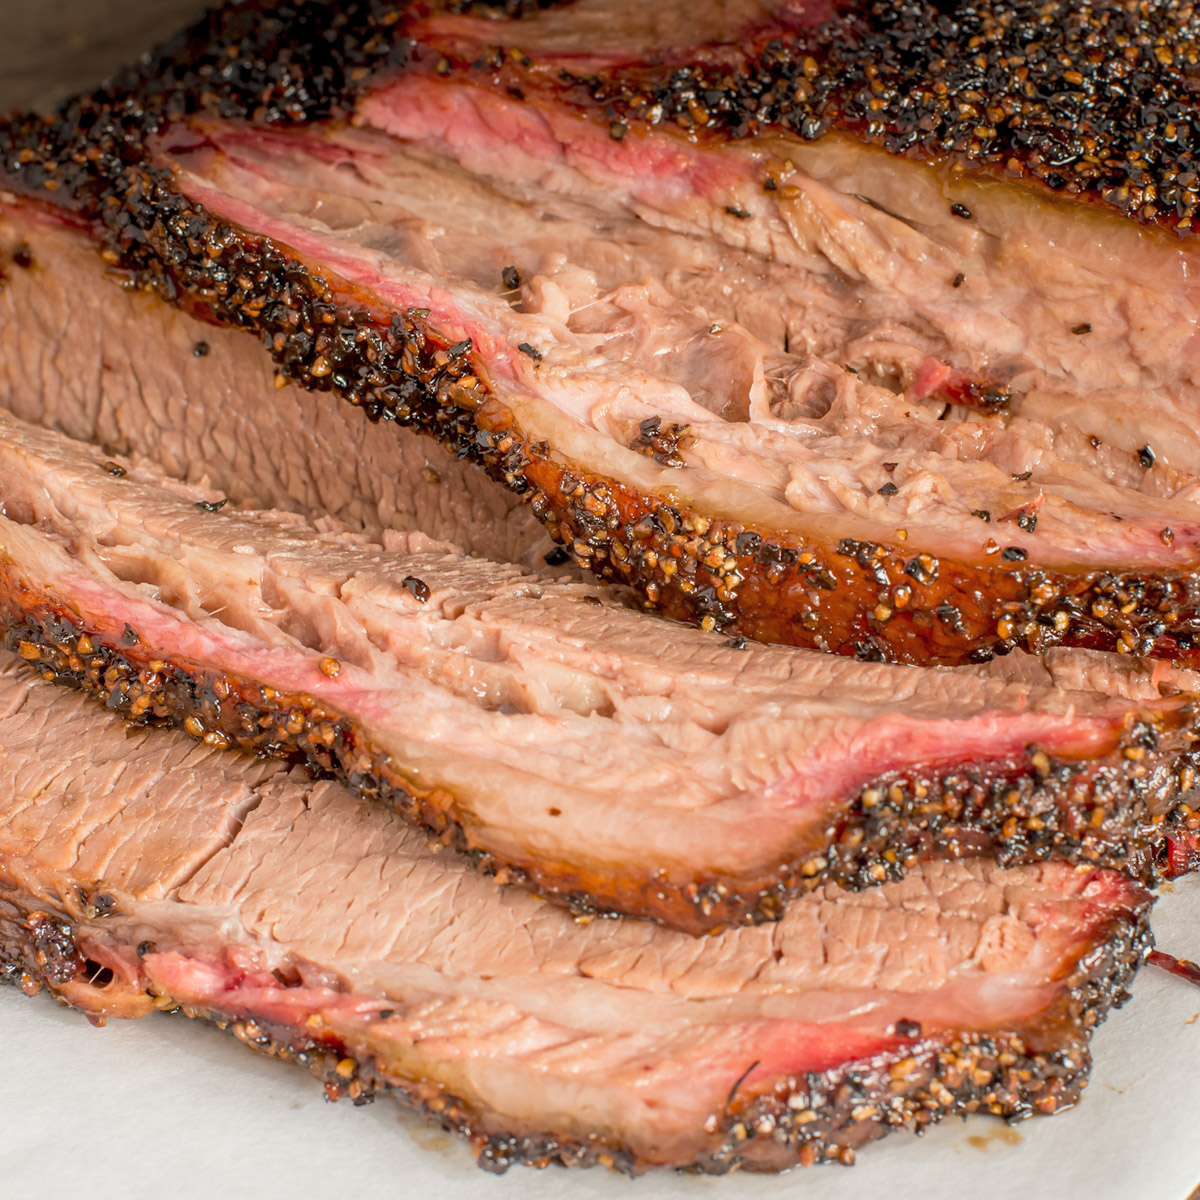
The brisket that rested for two hours is nice and juicy.
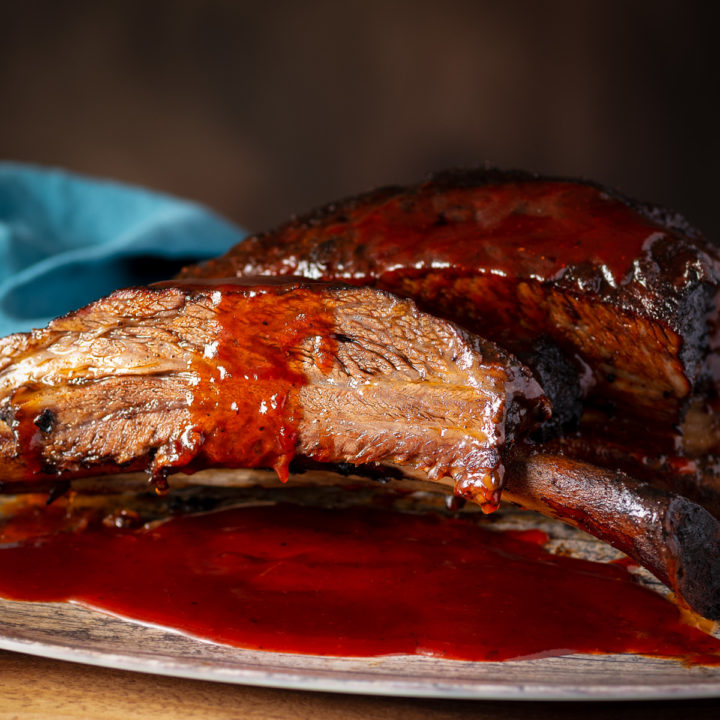
Slice the brisket and serve with BBQ sauce and the burnt ends, or, keep the burnt ends for yourself. I won't tell.
Equipment
The brisket in this recipe was cooked in an offset smoker using post oak as the fuel. I have also made this brisket in a Big Green Egg and a Kamado Joe while using a temperature control device like a Fireboard. Take a look at my video Why You Need a Fireboard for more information.
Storage
Store leftover brisket and burnt ends in an airtight container for up to 3 days.
Top Tip
If you are going to get serious about cooking low and slow in your smoker, think about investing in a temperature control device like a Fireboard. It connects to your phone and allows you to set the temperature you want. It will hold that temperature plus or minus a few degrees until you run out of fuel. I have used my Fireboard for overnight cooking, in the snow, at 225°F for 14 hours. Take a look at my video mentioned in the equipment section above.
Also, place a water pan either underneath the brisket or to the side if using an offset smoker. This helps maintain a little humidity inside the smoker.
FAQ
A brisket has to rest at least two full hours before it is cut. It needs that much time for the juices to be reabsorbed into the meat. Cut it too soon and the juices will run out and it will be dry.
As the smoke dissipates and the family gathers anxiously around the table, the smoky, succulent brisket and the coveted burnt ends are finally reveled. Each bite is a flavorful reminder of the slow-cooked magic that transforms simple ingredients into a something incredible. So, gather around the table and smile knowing that you have just mastered the art of smoking the perfect brisket. Congratulations!
Related
Looking for other recipes like this? Try these:
Pairing
These are my favorite dishes to serve with this recipe.
📖 Recipe
Smoked Brisket & Burnt Ends Recipe
Ingredients
Equipment
Method
- Preheat smoker to 250˚F - 275˚F. Trim the extra fat from the packer brisket.
- Rub the brisket with equal parts of kosher salt and black pepper.
- Smoke until the brisket reaches an internal temperature of 165˚F.
- Wrap the brisket in butcher paper coated with beef tallow. Return the brisket to the smoker until the internal temperature reaches 202˚F (about two hours).
- Remove the brisket from the smoker. Separate the point from the flap by gently inserting a knife between the two. The thin fat layer holding the two pieces together will be easy to cut through. Wrap the flat portion in butcher paper, then a few towels and place in a room temperature cooler to rest for two hours.
- Cut the point into 1.5 - 2" chunks and place in an aluminum pan. Cover with your favorite BBQ sauce and return to the smoker, uncovered for two hours.
- Slice the brisket and serve with BBQ sauce and the burnt ends, or, keep the burnt ends for yourself.

Leave a Reply